Thursday, May 18, 2023

Reproduction of a Merovingian Necklace

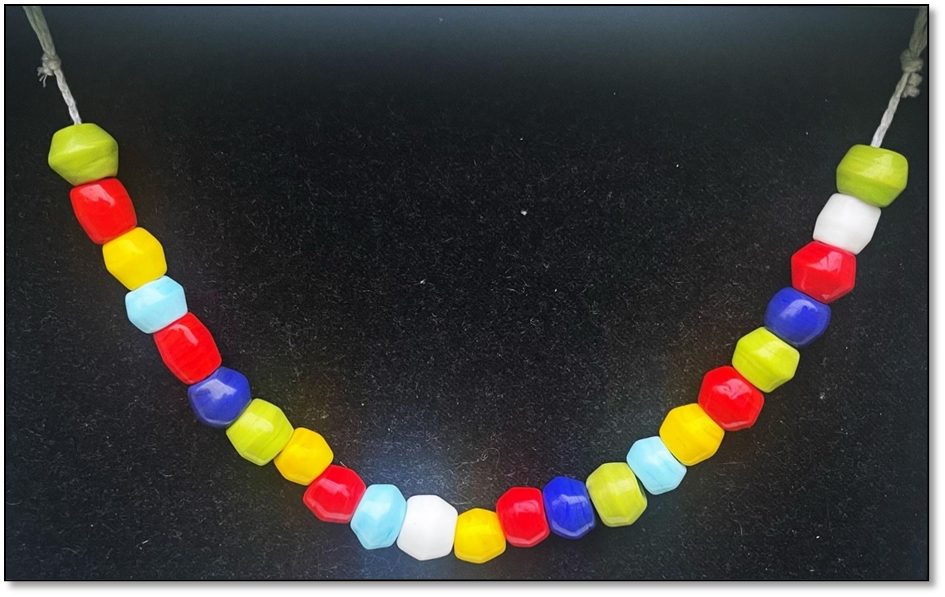
What? 23 monochrome, biconical glass beads from the Merovingian period

Where? Sigmaringen

When? 7th Century

Why? I chose this strand of beads as I loved how colourful and unique, they are. They are all undecorated, and whilst they may look simple, the biconical shape is complex to achieve well, and I have struggled with this in the past. Some of these beads are very worn, and as you can see the colour appears quite dull, unlike the new glass, which being modern, also has less impurities. This fits the Low Countries because Sigmaringen was part of Merovingian dynasty which stretch out across the Benelux countries/ Low Countries.

Details of the Recreation: I chose to recreate the strand displayed. Initially, I did not have the confirmed size of the individual bead. I emailed the British Museum who put me in contact with the curator. She kindly let me know that the beads average 1cm. I worked closely with a printed image of the work that I had printed to scale. I used a cm mapped out on my paper to check sizing and mimicked the more specific shapes such as the dark blue beads being smaller and less biconical. There weren’t many details of the excavation, so I used organic material to string the beads together. Organic materials such as linen thread was commonly used throughout times and cultures. The lay out of the beads is the same as the museum, but this may be a modern aesthetic.


The original

My version


Materials and techniques:

·         Glass

·         Technique: lampwork techniques to recreate a similar shape and size in each bead.

·         String: Corded string


     Images of the process: 


Working with Glass:

I have been working on developing my skill at melting glass and shaping it over the last couple of years. I have learnt a lot, including where in the flame certain glass must be placed so that it doesn’t ruin the colour or texture. I have learnt how to steadily place my hands and rotate both glass and mandrel so that an even amount of glass, at the right temperature, is kept at the right heat to reproduce the desired bead.

The necklace presented a variety of challenges. Glass is a dangerous, sometimes fickle substance, and certain colours only work properly at a certain heat.

Some of the trickier techniques (and melting glass onto a mandrel and keeping it even is tricky to start with!) that I used for this project include:

·         Studying each (photo of) bead in a variety of lights to get an accurate grasp of the details.

·         Technique of shaping initial bead, then shaping one side, keeping sides even, and then shaping the other side, whilst keeping everything even and melting at the correct temperature.

·         Working with tricky colours. These were all tricky. Light blue flashes (changes colour), red flashes, white burns, green can go red or brown, yellow gets red markings and the dark blue was a special shade and prone to melting too hot and reforming with impurities.

·         Shaping similar size beads


Details of the equipment and resources:


·         I used a graphite paddle, mandrels, bead release, a knife, fire annealing and gravity. I try to use the least tools possible and authentic equipment that would have been used by the glassmakers of the time. Apart from my fire set-up, all the equipment I have used would have been used at the time as well.

·         Clear broken glass was often used as well as imported blocks of coloured glass. (Regia Anglorum)

·         The glass rods I used to recreate these beads were Effetre Murano – 104 COE soft glass rods. This is a close replica of the glass that would have been used at the time.

·         Bead artisans would have created a small kiln or furnace. The broken recycled glass would be put into the furnace through holes in the side to melt in a dish inside the furnace. Air was pumped into the furnace to keep the charcoal hot. (Guido)

·         I use a hot head torch and MAPP gas. In the future I have plans to recreate a small portable kiln but melting glass in a small kiln is very difficult as getting the heat hot enough to melt the glass is a struggle.

·         Metal rods (mandrels) were dipped with a clay mixture called bead release. The molten glass is wound onto the rod until the desired shape was achieved. Once the bead size and shape were achieved, a design could be added by heating thin bits of glass and wrapping them around the bead, with a “stringer” that was heated and laid on top. (Guido)

·         I use mandrels that would have been very similar to those used, however, mine are shorter as they don’t need to be as long to reach into a hot fire. The bead release I use has the crucial ingredients of water, kaolin and alumina hydrate, which is a composition that would have been used.

·         Beads would then be moved to an annealing dish in the furnace. This would prevent thermal shock, lowering the chances of the bead cracking.

·         Instead of annealing them in a furnace, I use a product called vermiculite to allow the beads to cool down slowly. I also use a kiln. In the future, I would like to try annealing them in a furnace to see what it is like.

·         After the beads are finished, I remove them from the mandrels, clean them out with some bead cleaning tools and give them a quick clean with some soapy water.


Future Projects:


·         In the future, I would like to continue to practice more difficult skills, e.g., fine line work, millefiori use and making the Chinese Warring state Beads which had over 100 steps each.

·         I am enjoying creating pieces from different times and cultures that people have never seen, and I will continue to develop my skills by continuing to choose challenging and unique projects.

·         I also enjoyed working with the museum and the professor when I recreated a 133 bead Phoenician necklace, and I would like to continue working with people like this. Not only was it very educational and rewarding, but it resulted in me contributing to the historical accuracy of the museum- which I thought was cool! This project led the British museum to writing more specific information too, which is awesome!

·         I also intend to work on another historical recreation of a glass making set up.

Primary resource:

https://www.britishmuseum.org/collection/object/H_1908-0801-538

Provenance:
Sigmaringen, Baden-Württemberg, Germany; grave 5, found 1900; associated with 1908,0801.539


Secondary Resources: 

Guido, Margaret. The Glass Beads of Anglo-Saxon England: c. AD 400-700, Boydell Press, 1999.

Holgate, Barbara.  “The Pagan Lady of Peel”, St. Patrick’s Isle Archaeological Trust, 1987. 

Regia Anglorum: https://regia.org/

McGloin, Jemma: Of Beads and Burials: A Microwear and Experimental Study of Early Medieval Glass and Amber Beads from the Merovingian Site of Lent-Lentseveld.

Reproduction of a Paternoster – Medieval Rosary


What? Paternoster with glass beads.

Where? Many European countries such as France, Denmark, Germany, Italy etc.

When? 1400’s

Why? I chose this paternoster as there were many images showing the similar details in the piece. As well as extant pieces found, it is easy enough to recreate one in an authentic manner based on the amount of collaborating evidence. This was made for the Politarchopolis Valentines event in February.

My Version:


I have since updated this paternoster to red silk tassels and replaced two white beads with another two white beads without impurities and a more uniform shape. 

Images of various pieces: 

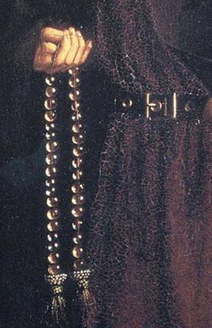
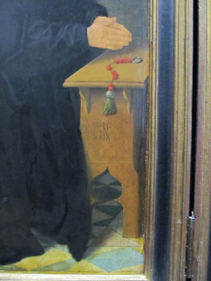
Figure 1- Rogier van der Weyden The Magdalen Reading


Figure 2- Die Anbetung des Lamm Gottes Jan & Hubert van Eyck, 1432


Figure 3- Lochner, Stefan - Outside of an Altar Wing - 1445-1450


Figure 4- Martyrium der Hl. Ursula 1448


Figure 5- The Birth of Christi, Gerard Davis, 1495


Materials and techniques:

-Glass (glass beads)

-Technique: lampwork techniques to recreate a similar shape and size in each bead.

String: Corded strings with tassels can be seen in most of the art.


Details of the Recreation: 

I chose to recreate the number of glass beads that can be seen on a number of the images that I have collected. The beads are simple, in one or two standard colors. They are unadorned, keeping the piety of decoration that was common at the time. 

Working with Glass:

I have been working on developing my skill at melting glass and shaping it over the last couple of years. I have learnt a lot, including where in the flame certain glass must be placed so that it doesn’t ruin the colour or texture. I have learnt how to steadily place my hands and rotate both glass and mandrel so that an even amount of glass, at the right temperature, is kept at the right heat to reproduce the desired bead.

The necklace presented a variety of challenges. Glass is a dangerous, sometimes fickle substance, and certain colours only work properly at a certain heat.

Some of the trickier techniques (and melting glass onto a mandrel and keeping it even is tricky to start with!) that I used for this project include:

·         Studying each (photo of) bead in a variety of lights to get an accurate grasp of the details.

·         Working with tricky colours.

·         Combining colours and the perfect melt down spot to get a more accurate shade and shape.

·         Shaping similar size beads


Details of the equipment and resources:


·         I used a graphite paddle, mandrels, bead release, a knife, fire annealing and gravity. I try to use the least tools possible and authentic equipment that would have been used by the glassmakers of the time. Apart from my fire set-up, all the equipment I have used would have been used at the time as well.

·         Clear broken glass was often used as well as imported blocks of coloured glass. (Regia Anglorum)

·         The glass rods I used to recreate these beads were Effetre Murano – 104 COE soft glass rods. This is a close replica of the glass that would have been used at the time.

·         Bead artisans would have created a small kiln or furnace. The broken recycled glass would be put into the furnace through holes in the side to melt in a dish inside the furnace. Air was pumped into the furnace to keep the charcoal hot. (Guido)

·         I use a hot head torch and MAPP gas. In the future I have plans to recreate a small portable kiln but melting glass in a small kiln is very difficult as getting the heat hot enough to melt the glass is a struggle.

·         Metal rods (mandrels) were dipped with a clay mixture called bead release. The molten glass is wound onto the rod until the desired shape was achieved. Once the bead size and shape were achieved, a design could be added by heating thin bits of glass and wrapping them around the bead, with a “stringer” that was heated and laid on top. (Guido)

·         I use mandrels that would have been very similar to those used, however, mine are shorter as they don’t need to be as long to reach into a hot fire. The bead release I use has the crucial ingredients of water, kaolin and alumina hydrate, which is a composition that would have been used.

·         Beads would then be moved to an annealing dish in the furnace. This would prevent thermal shock, lowering the chances of the bead cracking.

·         Instead of annealing them in a furnace, I use a product called vermiculite to allow the beads to cool down slowly. I also use a kiln. In the future, I would like to try annealing them in a furnace to see what it is like.

·         After the beads are finished, I remove them from the mandrels, clean them out with some bead cleaning tools and give them a quick clean with some soapy water.

·         I included a selection of creative beads using the resources that would have been available to make this necklace. As you can see, the original colour layout is more striking in colour.


Future Projects:


·         In the future, I would like to continue to practice more difficult skills, e.g., fine line work, millefiori use and making the Chinese Warring state Beads which had over 100 steps each.

·         I am enjoying creating pieces from different times and cultures and I will continue to develop my skills by continuing to choose challenging projects.

·         I also enjoyed working with the museum and the professor when I recreated a 133 bead Phoenician necklace, and I would like to continue working with people like this. Not only was it very educational and rewarding, but it resulted in me contributing to the historical accuracy of the museum- which I thought was cool!

·         I also intend to work on another historical recreation of a glass making set up.


Secondary Resources: 

Guido, Margaret. The Glass Beads of Anglo-Saxon England: c. AD 400-700, Boydell Press, 1999.

Holgate, Barbara.  “The Pagan Lady of Peel”, St. Patrick’s Isle Archaeological Trust, 1987. 

Regia Anglorum: https://regia.org/

Thursday, April 20, 2023

Latvian Glass Beads

Historical Notes


- The coils/spirals/wire weaving are much easier to document for this time period and location, however there is some evidence of glass work in the region and time.
- Keep in mind that glass beads in particular were a highly valued trade commodity and have been found across time periods and cultures, particularly annular beads, evil eye beads and round beads.
- In 2015, 200 burial mounds were discovered and looted- robbing the Latvian landscape of significant cultural knowledge and artifacts.
- Anna Zarina was a leading expert in the clothing and decorations of the ancient Latgallians.
- After World War I, the new sovereign states that emerged on the east coast of the Baltic Sea – Estonia, Latvia, Lithuania, and Finland – became known as the Baltic states.


Latvia

Finno Ugrian: Findspot; Latvia, Aizkraukle/Sigulda


Gold in Glass beads- Latvian finds

General

Lithuania
  • Anna Zariņa. Salaspils Laukskolas kapulauks. 10.-13. gadsimts. 350. lp

Misc:


Ancient Chinese Paintings

Chinese Paintings- Research starts


  • Look at particular famous ones, and follow up the information on the extant piece. 

  • What did they use? 

  • What was the style? 

  • Why did they make the choices they did? 

Eg: 

The Nymph of the Luo River – Gu Kaizhi. The Nymph of the Luo River, 10-13th century, handscroll, ink and colors on silk, Palace Museum, Beijing, China.

Image result for ancient chinese paintings


  • Local museums: 


  • Other museums:  


  • Research papers such as:


  • SCA resources such as: 


  • Pinterest: 


  • The period I have particularly researched is this one: 

  • Chinese Warring States Period. I have come across artworks such as this:

                        https://www.pinterest.com.au/pin/465700417734286934/